Friday, November 30, 2012

Creamy Holiday Potatoes

Around Thanksgiving and Christmas are the only two times in a year that I will forgive myself for all the unhealthy foods I've eaten. Throughout the year, I make my mashed potatoes using skim milk and very little butter or other fats. These mashed potatoes are rich, indulgent, and delicious, however fattening it may be, and I will ONLY make it around the holidays! Make sure you have a potato masher because if you use a handheld mixer it will overwork the starch and will make your creamy mashed potatoes turn into gummy mashed potatoes- not palatable.

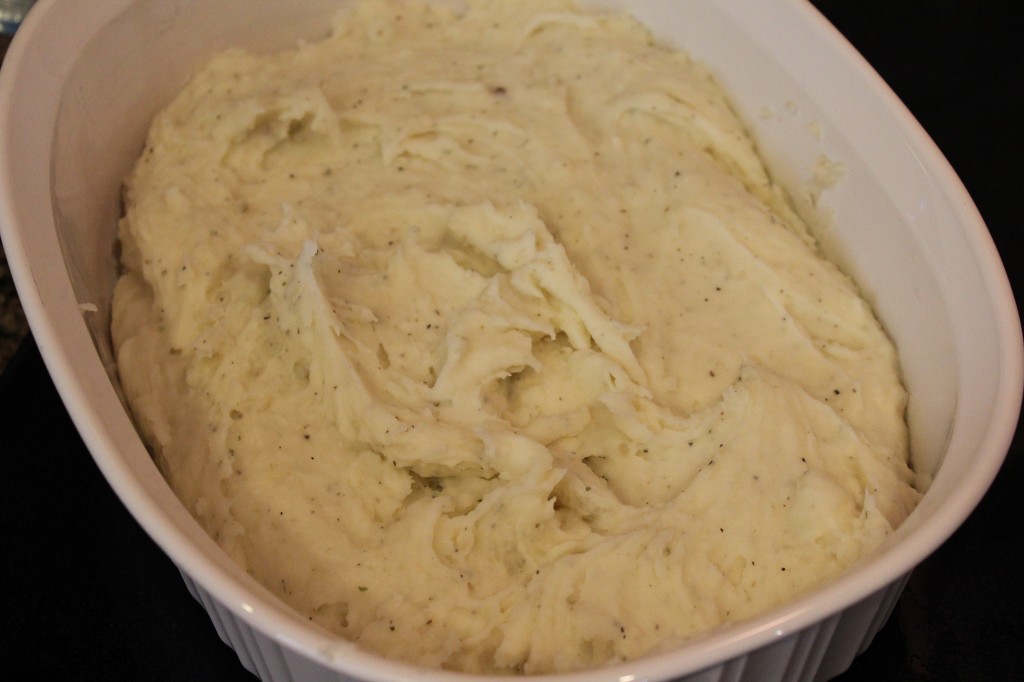
Creamy Mashed Potatoes
Yields: 3-4 servings


1½ pounds Idaho potatoes, cubed
5½ tbsp. unsalted butter, cubed, room temperature
2½ ounces cream cheese, cubed, room temperature
2 tbsp. heavy whipping cream
½ tsp. Lawry's seasoning (optional)
salt and pepper, to taste

Bring a large pot of water to a boil and salt generously. Once boiling, place potatoes in the water and cook until fork tender. Depending on the size you cut the potatoes, they may take anywhere from 20-45 minutes; mine took about 25 minutes. Once cooked, drain in a colander and put the potatoes back in the hot pot and over a very low heat. Putting the potatoes back into the same pot over a low heat allows for excess water to evaporate. I found that cubing the butter and cream cheese before bringing them to room temperature will allow quicker meting, but cubing is not necessary. Once melted, add in the heavy whipping cream. Taste for salt and pepper and adjust your seasoning. If you choose to add the Lawry's seasoning, go a little lighter on salt.

Enjoy!

Nutritional Info
  • Servings Per Recipe: 4
  • Amount Per Serving
  • Calories: 380.7
  • Total Fat: 25.6 g
  • Cholesterol: 75.0 mg
  • Sodium: 92.1 mg
  • Total Carbs: 34.6 g
  • Dietary Fiber: 5.1 g
  • Protein: 5.3 g


Wednesday, November 28, 2012

Fettuccine Alfredo

Michael's favorite dish at Olive Garden is the chicken fettuccine alfredo. Have you ever taken the time to on Olive Garden's website to look at the nutrition facts for that dish?! If you enjoy it and care about what you eat, don't eat it. After Thanksgiving, I had some heavy whipping cream left over from Michael's pumpkin pie and from my mashed potatoes. While we were at the grocery store, Michael asked if we had enough heavy cream to make an alfredo sauce for dinner one night. When we got home, I checked and we only had about ½ cup remaining. Heavy cream wouldn't be an optimal choice to make a sauce when considering low-fat. The recipe I have today for you is much healthier and tastes JUST as good. I actually think it tastes better because it isn't as rich and doesn't overpower the palate.

Light Alfredo Sauce
Yields: 2 servings

½ medium onion, chopped
1 large garlic clove, minced
1 tsp. vegetable oil
1 c. skim milk
½ c. chicken broth
2 tbsp. all-purpose flour
½ tbsp. salt
½ tbsp. pepper
¼ c. parmesan cheese, grated


In a small sauté pan, heat the oil over medium heat. Add the onions and garlic and sauté for about 4-5 minutes or until slightly golden brown and soft. In a medium saucepan, stir together the milk, chicken broth, flour, salt, and pepper over low heat until smooth and thick. Add the sautéed garlic and onions to the saucepan and stir constantly until the sauce has thickened. Stir in parmesan cheese until well blended.

Serve over fettuccine noodles or any other type of noodle you prefer (or have on hand)!


Nutritional Info
  • Servings Per Recipe: 3
  • Amount Per Serving
  • Calories: 114.5
  • Total Fat: 4.3 g
  • Cholesterol: 9.1 mg
  • Sodium: 350.7 mg
  • Total Carbs: 11.9 g
  • Dietary Fiber: 0.8 g
  • Protein: 7.4 g

Monday, November 26, 2012

Fajita Seasoning Mix

If you go in the grocery store and pick up a packet of taco seasoning or fajita seasoning, can you actually read every ingredient? You have to be a physicist to understand what the purpose of some of the ingredients are! I don't think that's necessary, plus if you cook regularly, you probably have all the ingredients in your pantry. I make this amount and use it as needed for recipes or wherever a taco or fajita seasoing is used. I keep it stored simply in a plastic bag with the date and contents. Here it is!


3 tbsp. cornstarch
1 tbsp. salt
1 tbsp. paprika
1 tbsp. sugar
2 tsp. chicken bouillon
1 tsp. onion powder
1 tsp. garlic powder

Simply combine and use where needed!


Saturday, November 10, 2012

Turkey Meatballs!

One of the great things about cooking is there are no rules. I also enjoy the fact that if you "mess up" it can open the doors to a completely different recipe that will still taste pretty darn good. I had some ground turkey that I had been wanting to use in a recipe, and I wanted to make something quick for dinner a few nights ago. I also had a half of a jar of spaghetti sauce that REALLY needed to be used. (I prefer my homemade sauce, but I keep spaghetti sauce on hand just in case.) Spaghetti it is.

I also make my own bread crumbs-I try not to waste anything. Any bread that is fixing to go stale or the heels of a loaf of bread all go into my gallon-size storage bag in the freezer until it's full. Then, to the food processor! If you decide to make your own, I would recommend leaving the crumbs a bit coarse so you can grind them finer if need be! Sometimes, the bigger crumbs are a benefit for crunch.

I started out making turkey meatballs, but the flavors ended up being better for a morning turkey sausage. Use it for either one, but next time I make these, I will definitely be doing patties and doing breakfast sandwiches with it. So, let's go!

Turkey Meatballs/Patties
Yield: 15 1-inch meatballs

1 lb. ground turkey (I used 85/15%)
¾ c. milk
¼ c. coarse bread crumbs
1 tbsp. mayonnaise
1 tbsp. Italian seasoning
2½ tsp. salt
1½ tsp. pepper
1 tsp. cinnamon

Line a cookie sheet with aluminum foil and spray lightly with cooking spray. In a small bowl, combine the bread crumbs with the milk and set aside. In a medium bowl, combine the mayonnaise, Italian seasoning, salt, pepper, and cinnamon and mix well. Next, if the bread crumbs seem to have a bit too much liquid, squeeze them until just moist and add to the spice mixture. I like to leave the breadcrumbs moist because the meatballs don't dry out in the oven. Once everything except the turkey is mixed well, add the turkey. You want to make sure the turkey is the last thing added! It is a lean meat and if worked too much, the meat will become tough once cooked. Mix with your hands until just combined. Roll the mixture into approximately 1-inch balls and place evenly across cookie sheet. Bake at 350° for 15 minutes, then flip the meatballs over and bake for an additional 20 minutes. Remove, let sit for 2-3 minutes and enjoy!


Nutritional Info
  • Servings Per Recipe: 15
  • Amount Per Serving
  • Calories: 60.1
  • Total Fat: 2.9 g
  • Cholesterol: 21.4 mg
  • Sodium: 445.5 mg
  • Total Carbs: 2.2 g
  • Dietary Fiber: 0.2 g
  • Protein: 6.5 g


Wednesday, November 7, 2012

Heathy eating!

As you may have noticed, most (if not all) of my recipes are somewhat healthy. For example, I prefer grilled versus fried food and also don't like full-fat sauces and dips. My palate enjoys light and refreshing flavors opposed to fatty and rich ones. The main reason for this post was because I absolutely loved my lunch this afternoon and wanted to post about it! Obsessed? No, just amazed!

Rewind just a tad- Michael and I went to Las Vegas for 10 days with a couple of our friends. Needless to say, eating wasn't the healthiest, but that was expected. On October 21, 2012, the group went to the Grand Canyon where Michael proposed!!! (It's a beautiful ring, by the way!) All the thoughts of planning a wedding came shortly after the excitement of becoming engaged! One of the first things that comes to mind is the dress. All women want to look their best on their wedding day, so I have been working to mold my diet towards some healthy weight loss.

My daily budget for calories is 1,453 calories. I've decided to start posting semi-regularly about the foods I'm eating and hope it helps some of you! Most people think "diet=bland". Well, not so! I like flavor just as much as the next person but I look for ways to bend to get flavor without fat and calories. As I said previously, today's lunch in particular was what amazed me!

I had a grilled cheese sandwich and soup. (I even had a little butter in it.) It doesn't sound like an impressive lunch, but the calorie content was VERY impressive: 310!!!! That's it! 310 calories and I was STUFFED! How did I do it? Well...

Low fat/low calorie grilled cheese
Yields: 1 serving
2 slices of wheat bread (120 cal.)
2 slices of fat-free american cheese (50 cal.)
1 tsp. of butter spread (20 cal.)

First, toast the slices of bread in the toaster to increase the crunchiness. Heat the spread in a small skillet and place one piece of bread along with the cheese slices. Allow the bread to crisp a little and the cheese to melt a bit. Then, add the top piece of bread and flip the sandwich over to crisp. That's it!

In total, my sandwich had 190 calories and 3.3g of fat! Also, I had a can of Campbell's Harvest Select Vegetable and Pasta Light. No fat, and only 120 calories for the entire can!

A very satisfying lunch, with ZERO guilt!

Enjoy healthy eating!

Tuesday, October 16, 2012

Porkchops and Applesauce-kind of.

I don't eat a lot of pork, so I thought I would give it a shot with a new recipe. It is a take on porkchops and applesauce. Instead of just serving applesauce with grilled porkchops, how about a glaze on top using apple cider or apple juice? YUM! The sweetness of the apple juice balances well with the boldness of the dijon mustard and they play off each other SO well. I almost wish I had made more of the glaze because it tasted SO good. I'm thinking it may work well as a dipping sauce! I served mine with roasted red potatoes and a salad, DELICIOUS! It was a hit with Michael as well.

Porkchops with Apple Glaze
Yields: 2 servings

½ tbsp. vegetable oil
1 tbsp. unsalted butter
4 center cut boneless porkchops, ½" thick
salt and pepper, to taste
2 cloves garlic, minced
¼ cup apple cider vinegar
1¼ cups apple juice or cider
2 tsp. dijon mustard

Heat vegetable oil and butter in a medium skillet over medium-high heat. Generously season both sides of pork with salt and pepper. Cook for 3-5 minutes on each side; once cooked, turn off heat and remove pork from the skillet and set aside. Add the minced garlic to the still hot pan (the fat in the pan will do the work of cooking the garlic without running the risk of burning it). After about 30-45 seconds, turn the heat to medium and pour in the vinegear. This will stop the cooking of the garlic and will help you deglaze the pan. Once deglazed, pour in apple juice and bring to a boil. After about 3 minutes, stir in the dijon mustard. If you desire a thicker sauce, in a small bowl, combine 1 tsp. of water and 1 tsp. of flour and whisk into the apple glaze. Add in the porkchops again and simmer to warm them through.

Enjoy!


Nutritional Info
  • Servings Per Recipe: 4
  • Amount Per Serving
  • Calories: 264.2
  • Total Fat: 9.2 g
  • Cholesterol: 62.8 mg
  • Sodium: 273.1 mg
  • Total Carbs: 10.4 g
  • Dietary Fiber: 0.1 g
  • Protein: 23.2 g


Saturday, October 6, 2012

Pasta problems.

     For lunch, sometimes I don't eat meat. Instead, I'll get my protein in other ways (peanut butter, yogurt, etc.). I decided on making some pasta! I am okay with eating any kind of pasta with a tomato or meat sauce ANYTIME! I was already about 4 minutes into the process of boiling the rotini when I grabbed my jarred (shh!) spaghetti sauce from the refrigerator. That's when my lunch idea took a turn for the worst.
     The spaghetti sauce was bad! I had a mini panic attack as I tried to figure out what to do next. Olive oil and garlic? No, I have that pretty often. Olive oil and balsamic vinegar? I was out of tomatoes and really prefer the tomatoes with the vinegar and oil. What do I do?! I opened the refrigerator and saw butter and parmesan cheese- gulp. I know that isn't the smartest meal option, but it was a quick fix for my pasta predicament! It was so good, that I decided to make it the next day for Michael and I for dinner, but I added meat! As always, you're the boss of your recipes, so feel free to change up the pasta, type of cheese, etc. This was fabulous!

Garlic Butter Chicken Rotini
Yields: 3-4 servings

2 8oz. boneless skinless chicken breasts, diced
4 tbsp. olive oil, divided
2-3 cloves of garlic, minced
2 cups uncooked rotini, cooked and drained
¼ cup parmesan cheese, grated or shredded
3-4 tablespoons unsalted butter
Salt and pepper to taste

In a large pot, cook rotini in well-salted water. Drain and set aside. In a medium skillet, heat 2 tbsp. olive oil and brown/cook chicken. Set aside in a bowl. In a skillet that has not been heated, add 2 tbsp. olive oil and minced garlic. Heat the two together over low heat and stir frequently. This will infuse the olive oil with the flavor of the garlic. Be careful not to burn any of the pieces of garlic as they will become bitter. Remove from heat and place butter in pan. Swirl the pan to encourage melting. Once the butter is melted, add parmesan cheese and gently stir until melted. In large pot, add rotini, chicken breast, and parmesan mixture. Stir well to combine. Add salt and pepper to taste.

Monday, October 1, 2012

An Ode to Chicken Pot Pie.

     Is there anyone out there like me who doesn't like chicken pot pie? I think it's something about the use of Veg-All, I hated that stuff. There's something about cooked and canned carrots that is SO unappealing. I'm not knocking canned vegetables, I do love the convenience of them, but I do not like Veg-All! Whew, now...I also don't like all the crust that a chicken pot pie, the filling makes the crusts kind of soggy- not for me. I also like chicken noodle casserole, so I thought, "What could be better than combining the two?!" (without Veg-All, of course).
     Yesterday was a little chilly and was rainy and dreary, so it was the perfect day for my creation! Feel free to use any other vegetables that you prefer. Also, I do not like cooked carrots very much, but LOVE the flavor they give, so I dice mine VERY fine, you can leave them as big as you like. Think of this as a crustless chicken pot pie, with noodles! What doesn't taste good with noodles?!

Chicken Noodle Casserole
Yields: 4-5 servings

2½ cups egg noodles, uncooked
2 8 oz. boneless skinless chicken breasts, cubed
1 tbsp. unsalted butter
1 rib celery, diced
1 small carrot, finely diced
½ medium onion, diced
2 cloves garlic, minced
1½ tsp. soy sauce
1 10.5 oz. can cream of chicken soup
1 tbsp. mayonnaise
2 tsp. ground black pepper
1 tsp. salt

Optional toppings: French fried onions, crushed saltine crackers, goldfish crackers, etc.

Preheat oven to 350°F. Spray a 2 quart baking dish with cooking spray. Boil the egg noodles according to package directions, drain and reserve. Add the chicken to a small skillet over medium heat; cook until no longer pink. Reserve in a medium bowl. Add butter to the same skillet and use the melted butter to deglaze the pan removing all brown bits. Once melted, add the celery, carrot, and onion. Saute over medium-low heat for 7-8 minutes, or until vegetables are tender-crisp. Stir in garlic and cook for about 45 seconds to 1 minute. Stir in soy sauce and cook for 30 seconds. Pour into the bowl with the reserved chicken, combine. In a small bowl, combine the cream of chicken soup, mayonnaise, pepper, and salt. If you think the mixture is a little thick, add 1 tbsp. of water at a time until you reach the desired consistency. In the baking dish, combine the noodles, chicken and vegetable mixture, and the soup mixture until thoroughly mixed. Bake in oven for 20 minutes, remove and if toppings are desired, add and place back in oven for 10 minutes. Allow to cool for 5-10 minutes before serving.


Nutritional Info
  • Servings Per Recipe: 5
  • Amount Per Serving
  • Calories: 259.4
  • Total Fat: 9.5 g
  • Cholesterol: 81.9 mg
  • Sodium: 722.1 mg
  • Total Carbs: 21.1 g
  • Dietary Fiber: 1.4 g
  • Protein: 23.1 g

Sunday, September 30, 2012

Simply Biscuits!

     I'm sitting here watching the Sunday game (go Panthers) with Michael and am FINALLY getting to write this post about a recipe I made the other day for some plain ole' biscuits. They were pretty good! As I was lying in bed at 4:30AM a few days ago, I could NOT get back to sleep. I'm not really sure why, but I remembered that Michael had hinted that he wouldn't mind having breakfast cooked for him before work. Since I couldn't sleep, I figured what better time to make breakfast than now? One problem- NO milk.
     I was thinking I could find a dairy-free recipe, but all the ones I found, seemed really complicated. I don't care who you are, complicated at 4:30AM is ridiculous! Nonetheless, I actually found one that used nonfat milk powder...which I had! These weren't as fluffy as I would have liked, but they definitely worked in a pinch. Hopefully those of you who try these, won't resort to bisquick again!


Simple Biscuits
Yields: 10 biscuits

2 cups flour
½ tsp. salt
3 tsp. baking powder
4 tbsp. butter, softened
¼ cup nonfat powdered milk
¾ cup water
(If you do not have powdered milk, just use ¾ cup of milk.)
1 tbsp. sugar

Preheat your oven to 450°F. Spray with cooking spray. Mix the powdered milk and water together in a small bowl, set aside. Combine the flour, salt, baking powder, and sugar in a large bowl. Cut in the butter using a fork or a pastry cutter. Once you've achieved a slightly crumbly texture that barely holds together when squeezed, add the powdered milk mixture and mix well. Turn out onto a floured surface and knead for approximately 30 seconds. Roll out until approximately 1/2" thick. Cut out biscuits using biscuit cutter, mason jar, pretty much anything round that you'd like. Bake in oven for 10-12 minutes or until lightly browned. Once removed from the oven, brush on a little bit of melted butter if desired.


Nutritional Info
  • Servings Per Recipe: 10
  • Amount Per Serving
  • Calories: 139.3
  • Total Fat: 4.9 g
  • Cholesterol: 12.4 mg
  • Sodium: 267.2 mg
  • Total Carbs: 21.0 g
  • Dietary Fiber: 0.7 g
  • Protein: 2.8 g


Wednesday, September 26, 2012

Turkey Sliders!

     On this journey to eat healthier and please Michael with my dinner selections, I've decided to do turkey burgers. They were delicious! Being a lean meat, sometimes turky breast can end up very dry. Making the recipe was simple, using a few tips I learned from one of my idols, Rachael Ray. For example, grating the onion directly into the bowl that contains the meat, you do not lose any of the juices and it adds such a great flavor! Also, the cinnamon adds a cozy warmth that you wouldn't expect in a burger. It's different, but so good. As my mother said, "I've never thought of cinnamon as a savory spice", but it works SO well. Most turkey burger recipes that I have seen contain a lot of fresh herbs. I like the flavor of the turkey meat, so I cut the herbs out.

Turkey Sliders
Yield: 12-16 sliders

1 lb. ground turkey breast
1 small onion, grated
2 tbsp. soy sauce
2 tbsp. ground black pepper
1 tsp. ground cinnamon

Place ground turkey breast in large bowl. Grate the onion directly over the meat Add the soy sauce, black pepper, and cinnamon. Mix to combine with your hands (I find this easiest) but if you want to use a spoonula, you can. Place on a flat surface and divide into fourths. You should be able to get about 4 sliders our of each section, depending on how big you make them.

1) Make the sliders a little larger than your buns, as they will shrink as they cook.
2) Once the slider is formed, indent the center. This will allow even cooking.

Heat a grill pan over medium-high heat. Grill sliders for approximately 3-4 minutes on each side. Once finished, place on slider buns or small dinner rolls. Top with whatever you like!

I chose mustard, ketchup, and a slice of plum tomato. Michael chose grilled mushrooms, mayonnaise, and ketchup. These were divine! With no cheese, they are even more healthy!

Nutritional Info
  • Servings Per Recipe: 14
  • Amount Per Serving
  • Calories: 38.5
  • Total Fat: 0.6 g
  • Cholesterol: 13.6 mg
  • Sodium: 446.3 mg
  • Total Carbs: 2.6 g
  • Dietary Fiber: 0.6 g
  • Protein: 5.7 g


Tuesday, September 25, 2012

Pum-Cakes!

     It's official. I've made my first pumpkin recipe for the 2012 season and I couldn't be any more pleased than I am right now! I saw an idea on Pinterest and wanted to recreate it. These pumpkin spice cupcakes are so delicious. They have a hint of sweetness and are very moist. I asked Michael what he thought of my creation and he said "good, scrumdiddly-umptious and all that junk". I think that's a good thing. (:
     I'm a fan of making things healthier, especially around this time of year. Not only is it just hard to avoid all the decadent foods, but it's ESPECIALLY hard when Michael's mom makes all her southern holiday cooking. It's SO hard to resist it all. I think this year I will have to chant "EVERYTHING IN MODERATION" over a hundred times in my head...maybe more. I'll be having dreams of her green bean casserole, but I think I should try to make a healthier version! I suppose it will be on my list of recipes to try.
     Anyway, back to the cupcakes. Around this time of year, pumpkin is used quite often and that's GREAT because pumpkin flesh is very low in calories and is fat-free. Canned pumpkin is AWESOME! ½ cup of canned pumpkin is 50 calories and 0 grams fat! It's the recipe that makes pumpkin bad for you (pumpkin pie, pumpkin bread, you get the idea).

To make these cupcakes you will need two ingredients. Easy, right?

Pum-Cakes
Yields: 24 cupcakes

1 15 oz. can of pure pumpkin
1 box of spice cake mix (or any mix for that matter)

Combine the two ingredients together in a large bowl. It may seem as if the batter will not come together, but keep stirring, it will! To make these cupcakes even cuter, I made them miniature minis. Confused? I grabbed the idea from Pinterest and used ketchup cups that I got at McDonald's for liners. Line your muffin tin (or in my case, put mini muffin cups on baking sheet) spray liners generously, and evenly distributing the batter (about half full). To make the muffins come out prettier I sprayed my index finger with cooking spray and smoothed the top of the batter. Bake for 25-30 minutes or until a toothpick inserted comes out clean.

These are EXCELLENT as they are, but I wanted to add a little more spice, so I made a spiced buttercream to go along with it. A little goes a very long way! Here's the recipe!

Spiced Buttercream
Yields: ½ cup

1 cup confectioner's sugar
4 tbsp. unsalted butter (softened)
1 tbsp. milk (you may need less)
1 tbsp. pure vanilla extract

In a medium bowl, use a mixer to beat the butter until smooth. Add confectioner's sugar and vanilla and combine. One teaspoon at a time, add the milk until your desired consistency has been reached. (I used 3 teaspoons.)

Nutritional Info
  • Servings Per Recipe: 24
  • Amount Per Serving
  • Calories: 134.7
  • Total Fat: 3.5 g
  • Cholesterol: 5.2 mg
  • Sodium: 141.2 mg
  • Total Carbs: 24.7 g
  • Dietary Fiber: 0.6 g
  • Protein: 1.3 g

Sunday, September 23, 2012

Soup called what?

YES! I have found the secret recipe for the amazing soup that is given at the beginning of the meal at a Japanese steakhouse! It is known by many names- hibachi soup, steakhouse soup, and I have even heard it called chicken broth- weird. Although it does have chicken bouillon in it, it is not the broth of a chicken! Like myself, I'm sure some of you are tired of asking to purchase a quart and getting a funny look. Now, I won't have to stand the looks anymore!

Contrary to what most believe, the soup that is served is NOT miso soup. Miso soup is essentially a Japanese soup in which dashi (stock made with seaweed and sardines) is combined with miso (fermented soybean paste). This Japanese onion soup is more basic, much easier to replicate, and in my opinion, SO much tastier!

It's fairly simple to make because there isn't much prep work and once it's boiling, you just let it simmer. How long it simmers is up to you, but no less than 45 minutes. The vegetables do not need to be diced or chopped precisely, as they are the flavoring and will be strained out. Also, taste occasionally as you may need to add more water. I added an additional 1½ cups of water because when I tasted mine, it was a little salty. In total, I used 9½ cups of water.

Japanese Onion Soup

1 small onion, quartered
2-3 carrots, roughly chopped
1 stalk celery, halved
2-3 cloves garlic, halved or quartered
½ inch of ginger, roughly chopped
2 tbsp. beef bouillon
2 tbsp. chicken bouillon
3 mushrooms, quartered
8 cups water

Optional toppings include scallions, french fried onions, thinly sliced mushrooms, etc.

Place all ingredients into a large saucepan or stock pot. Bring to a boil over high heat. Once boiling, cover and reduce heat to medium. Gently simmer for at least 45 minutes. (You may simmer anywhere from 45 minutes to 2 hours or more!) I recommend simmering for about an hour and a half. Remove from heat and strain the vegetables from the liquid. The vegetables should be discarded because they should have already given up their flavor into the stock. My favorite topping is french fried onions and scallions while my boyfriend prefers the mushrooms.

Enjoy!

Nutritional Info
  • Servings Per Recipe: 6
  • Amount Per Serving
  • Calories: 34.9
  • Total Fat: 0.5 g
  • Cholesterol: 0.0 mg
  • Sodium: 506.6 mg
  • Total Carbs: 6.8 g
  • Dietary Fiber: 1.4 g
  • Protein: 1.2 g


Friday, September 21, 2012

Last taste of summer.

     Ah- the leaves are beginning to change, the air is getting a little more crisp, and the temperatures are cooling down. These are all signs that fall is coming and I, for one, couldn't be more excited. Fall is my favorite time of year and I get as excited as a kid in a candy store when this time of year rolls around.
     I think it has to do with all the holidays bunched so close together along with spending time with family, which everyone seems to do more around the holidays. Is it just me or do people also seem a lot more kind in the fall? (Let's pretend those crazy Christmas shoppers don't exist for a moment, shall we?)
     Although I REALLY enjoy the flavors of the fall, I wanted to hang on to the summer just a bit longer. I think summer foods should be a little more light and salads are the epitome of "light". I decided on a cucumber, tomato, and fresh mozzarella salad which was to die for. I just drizzled a little bit of extra virgin olive oil and balsamic vinegar over mine, but if you have the time, I would recommend making a balsamic glaze! (Simply reduce balasmic vinegar over medium heat until thickened) DELICIOUS!


Final Summer Salad

Yield: 2 servings

1 cucumber, ¼" slices  (peeled or not, your choice)
3-4 plum tomatoes, chopped
2 oz. fresh mozzarella, cubed
½ stalk green onion, finely chopped
1½ tbsp. extra virgin olive oil
2-3 tbsp. balsamic vinegar

In a medium bowl, combine cucumber, tomatoes, onion, and mozzarella. You may either whisk together the olive oil and balsamic vinegar in a separate bowl, or pour each directly over your vegetables. Whichever way you prefer, gently toss to coat.

Enjoy!


Thursday, September 20, 2012

Apple Oat Muffins!

     This past weekend I went to an apple festival in a nearby town. I was extremely excited because I had missed the North Carolina Apple Festival in Hendersonville the week before. I had EVERY intention of purchasing some apples this year and was determined to make tons of apple recipes from them. Although it was extremely hot, my boyfriend and I did have a good time. Along the way, we also found prize-winning orangeade and some pretty cool knick-knacks!

     The apple oatmeal muffins I made are so delicious. They are mildly sweet with a hint of fall flavor (I suspect it's from the cinnamon). I thought they needed a little more "oomph" so I added a glaze. (Don't worry, I'll include the recipe for that as well) All in all, these muffins are a delightful (HEALTHY) treat, that even my boyfriend who grew up on fried food enjoys!

Apple Oat Muffins

Yield: 12 muffins

2 cups apples (see below)
1½ cups all-purpose flour
1 cup old fashioned oats
1/3 cup packed brown sugar (light or dark)
1½ tsp. baking soda
2 tsp. cinnamon (more or less to taste, this is a generous amount)
1/4 tsp. salt
1 cup plain fat-free yogurt
1/4 cup skim milk
2 egg whites
2 tbsp. vegetable oil
1½ tsp. vanilla extract

Preheat oven to 400F.
Spray muffin tin with non-stick cooking spray or use liners.

To begin, peel and core and dice (or grate) apples. I used two large golden delicious apples and diced fairly small and was able to reach 2 cups. You may choose to grate the apples if you want the apple to be a little more unnoticed. I happen to like the chunks of apples, so I opted to take the extra time to dice finely. Lay on paper towel and remove excess liquid (this may require a little squeezing)- the point is just to get them fairly dry before adding to batter.

In a large bowl, stir together flour, oats, brown sugar, baking soda, cinnamon, and salt. In a medium bowl, whisk yogurt, milk, egg whites, vegetable oil, and vanilla. Pour the wet mixture into your dry ingredients and fold gently just until combined. Be careful not to overmix. Fold in grated or diced apples.

Spoon the muffin batter into the cups evenly. Bake for 15-20 minutes, or until a toothpick inserted in the middle comes out clean. Place muffin tin on a wire rack and allow to cool for 10 minutes. Use a butter knife to loosen the edges of the muffins. Allow to cool completely before storing, or serve warm.


Maple-Cinnamon Glaze

1/4 cup powdered sugar
1 tsp. cinnamon
2 tsp. maple syrup
1 tbsp. skim milk

Combine powdered sugar, cinnamon, and maple syrup. Add milk slowly, until  desired consistency is achieved. Drizzle over muffins or spread a thin layer over top of each.


Nutritional Info(Amounts reflect no glaze)
  • Servings Per Recipe: 12
  • Amount Per Serving
  • Calories: 149.4
  • Total Fat: 3.0 g
  • Cholesterol: 0.1 mg
  • Sodium: 180.6 mg
  • Total Carbs: 26.8 g
  • Dietary Fiber: 2.0 g
  • Protein: 3.9 g