Showing posts with label garlic. Show all posts

Tuesday, August 27, 2013

Flank Steak Stir-Fry with Asparagus and Bell Pepper


     This is a delicious dish that you can whip up in no time. It's fast, it's easy, it's STEAK! Those are three things that I think most Americans LOVE together. There's something about tender slices of beef flavored with soy sauce, ginger, and garlic that makes someone fall in love. Not really, but it's more sophisticated than your ordinary redneck BBQ found here in the south, sans beer. I'm sure you could add some alcohol in this dish to add even more depth of flavor, (red wine) but here, I kept it simple stupid. I loved it, Michael loved it, YOU will love it! Seriously, give it a try! What do you have to lose? (Maybe a few eyebrows if you throw in your alcohol without removing from heat first).
I'm done, enjoy your meal!

Flank Steak Stir-Fry with Asparagus and Bell Pepper
Yields: 4 servings


2 tbsp. vegetable oil

½ lb. asparagus, trimmed into ½” pieces, parboiled *SEE NOTES*

½ lb. flank steak, sliced thinly, into ¼” strips

½ bell pepper sliced ¼” strips

2 tsp. cornstarch, dissolved into 2 tbsp. water
 

All-Purpose Stir Fry Sauce

3 tbsp. soy sauce

1 tsp. grated ginger

1 clove garlic, grated

½ tsp. chili oil (for those who like it spicy)


First, prepare the all-purpose stir fry sauce in a small container and set aside. This will allow the flavors to combine. Next, stir-fry the asparagus in 1 tbsp. oil over high heat for 1-2 minutes until lightly browned.
 Remove and set aside. Using the remaining oil (add more if necessary), stir fry the beef strips just until browned. (The strips should remain pink inside.)
 
Add the bell pepper and stir fry for 2 minutes, or until the strips begin to wilt. The bell pepper adds a great texture to the dish if kept tender-crisp.
 
 
Add the corn starch mixture and the stir fry sauce and stir quickly (liquids will thicken fast). Return the asparagus to the pan and toss to coat thoroughly with sauce. Serve over rice.
 
·         Since the only salt being added here is soy sauce, make sure you taste for seasoning before serving, as my final dish needed additional salt.
Asparagus is a great vegetable to add to dishes because it has a great flavor and keeps a bit of crunch after cooking (provided it’s cooked properly). To prepare the asparagus and to parboil it, you will first need to inspect your asparagus to get rid of any of the unwanted spears. Any spears that have “heads” which are not closely knit should be discarded. Next, you’ll want to remove the woody ends, as they are tough and fibrous—not pleasing to the palate. To do so, hold a spear between both hands and bend it, the spear will snap where it begins to be tender. Repeat this step for all the spears, or simply use the first spear as a guide and cut the same length off the rest of the asparagus. Next, cut the spears on the diagonal about ¼” pieces.
To parboil the asparagus, bring a pot of water to a boil, add the asparagus, and cook for 1 minute, or until the asparagus is a bright green color. If it cooks until it is an olive green color, the asparagus will be mushy and the color isn’t very pretty. Next, drain the asparagus and “shock” it with ice water—this will stop the cooking process, keeping the asparagus tender-crisp and beautiful.
Nutritional Info
Servings Per Recipe: 4
  • Amount Per Serving
  • Calories: 138.3 
  • Total Fat: 7.8 g    
  • Cholesterol: 28.4 mg
  • Sodium: 493.2 mg
  • Total Carbs: 4.5 g
  • Dietary Fiber: 1.3 g
  • Protein: 13.1 g
 

Sunday, April 7, 2013

Nom Nom Stir Fry!

     Sometimes, you just don't feel like going out for dinner, but want to cook something simple, easy, and delicious. Most think time-consuming meals aren't worth it because there is usually not much time to cook when you come home from your workday. Either that, or you just lack all energy from exerting yourself at work. Your boss knows how hard you work, right? Stir fry dishes are a great way to go if you want something quick and delicious and they are very versatile, in that you can use up leftover vegetables that you don't know what to do with. Cabbage is also a common ingredient in stir fry, and it really helps you stretch your dollars. It's generally around $0.59/lb and 2 pounds is ALOT of cabbage! It's a great addition to meals! (It's great in soups, too!) 

     No teriyaki sauce? I've linked my recipe for it in the ingredients section! (;


Chicken and Cabbage Stir Fry
Yields: 3 servings

1 tbsp. vegetable oil
1 tsp. pepper
1 tbsp. sugar
2  cloves garlic, minced
2 C. cabbage, shredded
1 tbsp. cornstarch
¾ C. onion, sliced
1 tbsp. teriyaki sauce
1 lb. boneless skinless chicken breast, thinly sliced
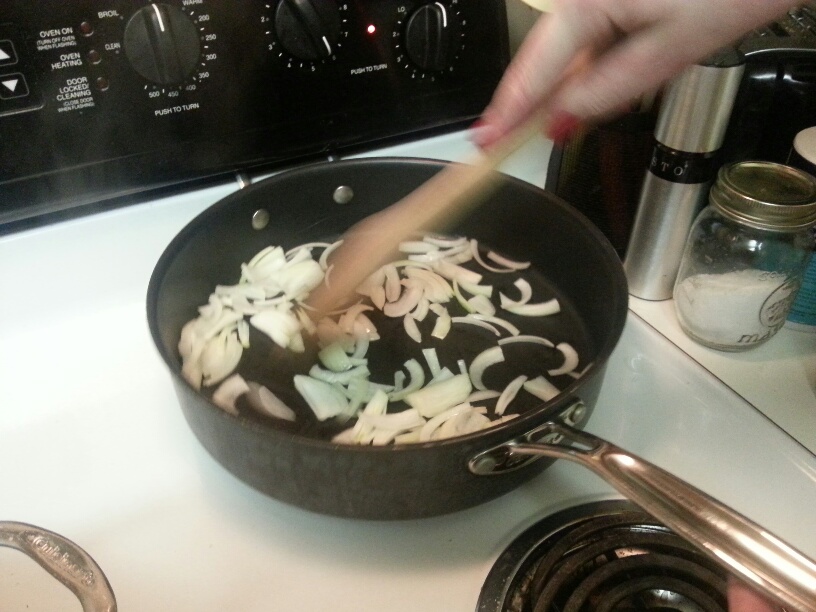
In a medium bowl, place the chicken, teriyaki sauce, sugar, and pepper. Toss to coat the chicken well and set aside. In a large skillet, with high sides, heat the oil over medium heat. Add onions and fry for about 3 minutes, or until just translucent. 
Add the garlic and stir fry for 1 minute, until fragrant.  
Add the chicken and brown, stirring every two minutes or so. 
Once the chicken is cooked, add the cabbage and stir well. Cover and allow cabbage to cook down and soften. 
Once the cabbage is tender to your liking, add teriyaki sauce and stir well. In a separate bowl, combine water and cornstarch to create a slurry. Once well combined, stir in slurry and allow the liquid to come to a boil. Once it comes to a boil, reduce heat to low and simmer until thickened. Serve over rice.

This is extremely delicious the next day as leftovers as well! I added broccoli for a little extra flavor!


Nutritional Info
  • Servings Per Recipe: 3
  • Amount Per Serving
  • Calories: 458.8
  • Total Fat: 6.2 g
  • Cholesterol: 86.7 mg
  • Sodium: 574.8 mg
  • Total Carbs: 71.2 g
  • Dietary Fiber: 1.5 g
  • Protein: 31.9 g

Thursday, March 28, 2013

Simple Potato Soup

Hey y'all! I hope you are all doing well! I'm doing alright, just relaxing at home while I have dinner cooking away in the slow cooker. If the recipe turns out as expected, I will definitely have a post on it with the recipe. Tonight's dinner is not what this post is about. No, what this post is about is how it's spring time here in North Carolina, but we have had freeze warnings and temperatures in the 20s recently. Are you serious, mother nature? Anyways, this weekend is supposed to be much warmer, with highs in the mid-60s, so I wanted to take advantage of a soup...just once more. 
     Don't get me wrong, I can eat soup during spring, summer, fall, or winter, but it's just so much more appealing in the colder months. Let's face it, when it's 95 degrees outside, do you really want to be stuffing your face with 98 degree soup?! I think not. Anyways, for lunch, I decided on some potato soup. I have been craving it recently and decided on making some. I did want to lighten it up a bit, as most classic potato soups have heavy cream. I will tell you this: I succeeded. Give this recipe a try, you won't regret it. You will never miss the cream in this tasty soup! 


Simple Potato Soup

Yields: 2 servings

1 tbsp. unsalted butter
1 garlic clove, minced
1 large potato, cubed
¼ c. onion, chopped
2 tsp. Italian seasoning
1 tsp. dried parsley
1 ¼ c. chicken stock
¼ c. milk
1 tsp. cornstarch
2 tsp. water


In a medium saucepan, melt the butter over medium heat. Add the garlic clove and stir for 30 seconds to 1 minute, being careful not to burn the garlic. Next, add the onions and allow to cook until translucent, about 3 to 4 minutes. 
Add the potatoes, Italian seasoning, and parsley and cook, stirring frequently about 3 minutes.
Carefully add in the chicken stock and bring to a boil, reduce to simmer. Continue to cook on low heat for approximately 15 minutes, or until potatoes are fork tender. Using a potato masher, break some of the potatoes up. This is optional, but I think it helps add a little more thickness.
 Create a slurry using the cornstarch and water, by mixing them together and adding to the soup. Bring to a boil, once again, and stir for 1 minute. Once you are satisfied with the texture and thickness of your soup, remove from heat and stir in milk!


Nutritional Info
  • Servings Per Recipe: 2
  • Amount Per Serving
  • Calories: 214.7
  • Total Fat: 6.6 g
  • Cholesterol: 20.2 mg
  • Sodium: 645.4 mg
  • Total Carbs: 35.1 g
  • Dietary Fiber: 4.9 g
  • Protein: 5.3 g

Wednesday, February 20, 2013

Garlic Soy Tuna


     So, Michael has named this "Garlectra Tuna". Why? Because the flavor of the garlic combined with the soy sauce created a spark in his mouth. Weird, I know. But, that's my fiance. We are still waiting to hear back from our agent regarding the house, and we're still hoping for the best. We haven't really prepared for the worst, but we know that everything happens for a reason. If this isn't the house, we'll find it eventually. 
     Tuna is a great fish to have in your diet because of all the omega-3s and it is lean. I enjoy it as a source of protein and will definitely be making it more since I've found this recipe. It has given me hope for tuna! If you don't prefer the flavor of tuna, I would recommend this marinade because the flavors in the marinade are really heightened and it's SO delicious!  


Garlic Soy Tuna Steaks
Yields: 2 servings

2 tuna steaks, 3.5 oz each
1/4 c. orange juice
1/4 c. soy sauce
1 clove garlic, minced
1/2 tsp. ground black pepper
1 tbsp. dried parsley
1 tsp. dried oregano
3 tbsp. olive oil, (1 tbsp. for cooking)

     In a medium shallow baking dish (glass or non-reactive), mix together all the ingredients minus the tuna. Place the tuna in the marinade and turn to coat. Cover and refrigerate for an 30 minutes. Flip the tuna and refrigerate for another 30 minutes. Remove tuna from marinade and set aside on a plate. In large pan heat about 1 tablespoon olive oil on medium high.  Lay each steak in the pan, don't move them, and cook for 4 minutes.  Flip and cook the other side for 4 minutes or to desired doneness. Let it sit for couple of minutes before serving. 

     I served these over stir-fried vegetables and rice, and my recipe for this will be coming soon! 


Nutritional Info
  • Servings Per Recipe: 2
  • Amount Per Serving
  • Calories: 262.2
  • Total Fat: 14.5 g
  • Cholesterol: 43.7 mg
  • Sodium: 1,191.6 mg
  • Total Carbs: 6.0 g
  • Dietary Fiber: 0.3 g
  • Protein: 25.8 g


Saturday, October 6, 2012

Pasta problems.

     For lunch, sometimes I don't eat meat. Instead, I'll get my protein in other ways (peanut butter, yogurt, etc.). I decided on making some pasta! I am okay with eating any kind of pasta with a tomato or meat sauce ANYTIME! I was already about 4 minutes into the process of boiling the rotini when I grabbed my jarred (shh!) spaghetti sauce from the refrigerator. That's when my lunch idea took a turn for the worst.
     The spaghetti sauce was bad! I had a mini panic attack as I tried to figure out what to do next. Olive oil and garlic? No, I have that pretty often. Olive oil and balsamic vinegar? I was out of tomatoes and really prefer the tomatoes with the vinegar and oil. What do I do?! I opened the refrigerator and saw butter and parmesan cheese- gulp. I know that isn't the smartest meal option, but it was a quick fix for my pasta predicament! It was so good, that I decided to make it the next day for Michael and I for dinner, but I added meat! As always, you're the boss of your recipes, so feel free to change up the pasta, type of cheese, etc. This was fabulous!

Garlic Butter Chicken Rotini
Yields: 3-4 servings

2 8oz. boneless skinless chicken breasts, diced
4 tbsp. olive oil, divided
2-3 cloves of garlic, minced
2 cups uncooked rotini, cooked and drained
¼ cup parmesan cheese, grated or shredded
3-4 tablespoons unsalted butter
Salt and pepper to taste

In a large pot, cook rotini in well-salted water. Drain and set aside. In a medium skillet, heat 2 tbsp. olive oil and brown/cook chicken. Set aside in a bowl. In a skillet that has not been heated, add 2 tbsp. olive oil and minced garlic. Heat the two together over low heat and stir frequently. This will infuse the olive oil with the flavor of the garlic. Be careful not to burn any of the pieces of garlic as they will become bitter. Remove from heat and place butter in pan. Swirl the pan to encourage melting. Once the butter is melted, add parmesan cheese and gently stir until melted. In large pot, add rotini, chicken breast, and parmesan mixture. Stir well to combine. Add salt and pepper to taste.

Monday, December 19, 2011

Bustin' My Chops

     Tonight for dinner, I decided to do pork chops. I haven't cooked (or eaten, for that matter) pork chops in YEARS, due to some pretty gnarly experiences. Particularly, bone-dry meat and an aching jaw for a few days. It seems as though no matter how much you chew a ridiculously dry piece of meat, it will never go down quite right! I figured I would sear the pork chops in a pan and then bake them off in the oven. This ended up making fork-tender pork chops that were DELICIOUS...and a recipe which I will be using again! I served them alongside a green bean casserole and yeast rolls. 
     Note: I would not recommend serving with a green bean casserole, simply because the cream of mushroom soup in both parts of the meal (pork chops and casserole) makes it almost too rich to enjoy. Serving the pork chops with a side of just green beans would have been a better idea. Oh well, live and learn!


Baked Pork Chops

6 Pork Chops
1½ tsp. Garlic Powder
1½ tsp. Seasoning Salt
2 Eggs, beaten
½ c. All-Purpose Flour
1½ c. Italian-Seasoned Bread Crumbs
¼ c. Olive Oil
1 (10.75 oz) can of Condensed Cream of Mushroom Soup
⅓ c. Milk
⅓ c. White Wine

Preheat oven to 350°F. 
Rinse pork chops, dry thoroughly, and season on both sides with the garlic powder and
seasoning salt, to taste. (I went liberal and rubbed it in a little.)

 Dredge the pork chops first in the flour, then into the egg, and coat liberally with bread crumbs.

Heat the olive oil in a medium skillet over medium heat. Sear the pork chops 
approximately 3-4 minutes per side, or until the breading appears brown. 

Place the pork chops in a 9"X13" baking dish, cover with foil. Bake for 30 minutes. Meanwhile, combine the can of cream of mushroom soup, milk, and white wine in a medium bowl. 

After the pork chops have baked for 30 minutes, remove from the oven and pour the soup mixture over them. Replace the foil and bake for another 30 minutes. 

Once finished, remove from the oven and leave foil on for about 5 minutes to let the meat rest, then remove and serve!