Showing posts with label green. Show all posts

Tuesday, August 27, 2013

Flank Steak Stir-Fry with Asparagus and Bell Pepper


     This is a delicious dish that you can whip up in no time. It's fast, it's easy, it's STEAK! Those are three things that I think most Americans LOVE together. There's something about tender slices of beef flavored with soy sauce, ginger, and garlic that makes someone fall in love. Not really, but it's more sophisticated than your ordinary redneck BBQ found here in the south, sans beer. I'm sure you could add some alcohol in this dish to add even more depth of flavor, (red wine) but here, I kept it simple stupid. I loved it, Michael loved it, YOU will love it! Seriously, give it a try! What do you have to lose? (Maybe a few eyebrows if you throw in your alcohol without removing from heat first).
I'm done, enjoy your meal!

Flank Steak Stir-Fry with Asparagus and Bell Pepper
Yields: 4 servings


2 tbsp. vegetable oil

½ lb. asparagus, trimmed into ½” pieces, parboiled *SEE NOTES*

½ lb. flank steak, sliced thinly, into ¼” strips

½ bell pepper sliced ¼” strips

2 tsp. cornstarch, dissolved into 2 tbsp. water
 

All-Purpose Stir Fry Sauce

3 tbsp. soy sauce

1 tsp. grated ginger

1 clove garlic, grated

½ tsp. chili oil (for those who like it spicy)


First, prepare the all-purpose stir fry sauce in a small container and set aside. This will allow the flavors to combine. Next, stir-fry the asparagus in 1 tbsp. oil over high heat for 1-2 minutes until lightly browned.
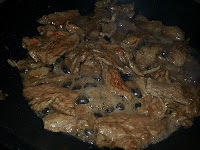
 Remove and set aside. Using the remaining oil (add more if necessary), stir fry the beef strips just until browned. (The strips should remain pink inside.)
 
Add the bell pepper and stir fry for 2 minutes, or until the strips begin to wilt. The bell pepper adds a great texture to the dish if kept tender-crisp.
 
 
Add the corn starch mixture and the stir fry sauce and stir quickly (liquids will thicken fast). Return the asparagus to the pan and toss to coat thoroughly with sauce. Serve over rice.
 
·         Since the only salt being added here is soy sauce, make sure you taste for seasoning before serving, as my final dish needed additional salt.
Asparagus is a great vegetable to add to dishes because it has a great flavor and keeps a bit of crunch after cooking (provided it’s cooked properly). To prepare the asparagus and to parboil it, you will first need to inspect your asparagus to get rid of any of the unwanted spears. Any spears that have “heads” which are not closely knit should be discarded. Next, you’ll want to remove the woody ends, as they are tough and fibrous—not pleasing to the palate. To do so, hold a spear between both hands and bend it, the spear will snap where it begins to be tender. Repeat this step for all the spears, or simply use the first spear as a guide and cut the same length off the rest of the asparagus. Next, cut the spears on the diagonal about ¼” pieces.
To parboil the asparagus, bring a pot of water to a boil, add the asparagus, and cook for 1 minute, or until the asparagus is a bright green color. If it cooks until it is an olive green color, the asparagus will be mushy and the color isn’t very pretty. Next, drain the asparagus and “shock” it with ice water—this will stop the cooking process, keeping the asparagus tender-crisp and beautiful.
Nutritional Info
Servings Per Recipe: 4
  • Amount Per Serving
  • Calories: 138.3 
  • Total Fat: 7.8 g    
  • Cholesterol: 28.4 mg
  • Sodium: 493.2 mg
  • Total Carbs: 4.5 g
  • Dietary Fiber: 1.3 g
  • Protein: 13.1 g
 

Tuesday, February 19, 2013

Chicken & Green Bean Casserole

     My fiance and I are currently trying extremely hard to find a house. Our lease for our apartment will be up on April 28, 2013 and as those of you who have purchased a home before know, it takes TIME...and lots of it. We've been looking since the middle of January and it's now the end of February. We've exhausted all of our current options for a home and we've had our ups and downs throughout the process. Well, downs...I suppose if we had an "up" we would have a house. Anyways, needless to say, it's been a stressful couple of months. I WILL keep my head up, no matter what. My passion is cooking, so it definitely relieves me and calms me down. Moving on.

     I'm sure I've told you this before, but one of my favorite things to cook on busy nights are slow cooker recipes. My other favorite thing to cook is a casserole. Casseroles are easy for the same reason as slow cooker recipes. You generally throw it all together and go! They are extremely delicious and most of the time, creamy. I envision creamy foods more appropriate during the winter, but are always good for dinner.


Chicken Green Bean Casserole
Yield: 4-6 servings

1 pkg. (6 oz.) STOVE TOP Stuffing Mix for Chicken or Turkey
1 Tbsp. butter
1/2 tbsp. vegetable oil
2 small  boneless skinless chicken breasts, cubed
1/2 tsp. black pepper
1 (28 oz.) can green beans, undrained
1 small onion, chopped
1/4 cup flour
1 (10.5 oz.) can cream of chicken soup, undiluted


Preheat oven to 400 degrees.
Prepare stuffing as directed on package.
In a large non-stick skillet, melt butter and stir fry chicken, season with pepper and fry for approximately 5 minutes per side. Once thoroughly cooked, remove and place in an 8"X8" greased baking dish. Add vegetable oil and saute' onion until translucent, then add green beans and flour. Once flour is combined, add cream of chicken. Stir well and bring to a boil. Reduce heat and cook for approximately one minute with constant stirring. Pour green bean mixture over reserved chicken. Top with the prepared stuffing mix. Bake for 30 minutes. Remove from oven and allow to cool for 10 minutes.

Enjoy!


Nutritional Info
  • Servings Per Recipe: 6
  • Amount Per Serving
  • Calories: 263.8
  • Total Fat: 7.2 g
  • Cholesterol: 34.4 mg
  • Sodium: 1,180.1 mg
  • Total Carbs: 27.1 g
  • Dietary Fiber: 2.0 g
  • Protein: 14.0 g


Monday, December 19, 2011

Bustin' My Chops

     Tonight for dinner, I decided to do pork chops. I haven't cooked (or eaten, for that matter) pork chops in YEARS, due to some pretty gnarly experiences. Particularly, bone-dry meat and an aching jaw for a few days. It seems as though no matter how much you chew a ridiculously dry piece of meat, it will never go down quite right! I figured I would sear the pork chops in a pan and then bake them off in the oven. This ended up making fork-tender pork chops that were DELICIOUS...and a recipe which I will be using again! I served them alongside a green bean casserole and yeast rolls. 
     Note: I would not recommend serving with a green bean casserole, simply because the cream of mushroom soup in both parts of the meal (pork chops and casserole) makes it almost too rich to enjoy. Serving the pork chops with a side of just green beans would have been a better idea. Oh well, live and learn!


Baked Pork Chops

6 Pork Chops
1½ tsp. Garlic Powder
1½ tsp. Seasoning Salt
2 Eggs, beaten
½ c. All-Purpose Flour
1½ c. Italian-Seasoned Bread Crumbs
¼ c. Olive Oil
1 (10.75 oz) can of Condensed Cream of Mushroom Soup
⅓ c. Milk
 c. White Wine

Preheat oven to 350°F. 
Rinse pork chops, dry thoroughly, and season on both sides with the garlic powder and
seasoning salt, to taste. (I went liberal and rubbed it in a little.)

 Dredge the pork chops first in the flour, then into the egg, and coat liberally with bread crumbs.

Heat the olive oil in a medium skillet over medium heat. Sear the pork chops 
approximately 3-4 minutes per side, or until the breading appears brown. 

Place the pork chops in a 9"X13" baking dish, cover with foil. Bake for 30 minutes. Meanwhile, combine the can of cream of mushroom soup, milk, and white wine in a medium bowl. 

After the pork chops have baked for 30 minutes, remove from the oven and pour the soup mixture over them. Replace the foil and bake for another 30 minutes. 

Once finished, remove from the oven and leave foil on for about 5 minutes to let the meat rest, then remove and serve!